Haptics
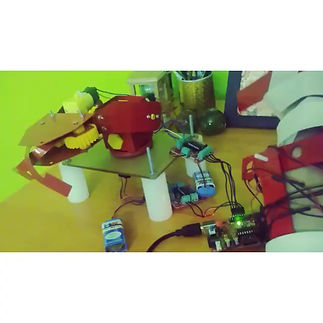
Designed and implemented a robotic arm that imitates the human arm. For Phase 2, Integrated the arm design with an EEG to control the motion with brainwaves and eye blink making it wireless.
Situation:
Millions of people are suffering today as a result of a lack of a functional arm, which prevents them from doing things we take for granted. Until about five years ago, the idea that these people could have a prosthetic arm that would do more than just look nice, but would also allow them to regain functionality with natural control via the brain seemed far-fetched. Recently, ground-breaking methods for doing so have been successfully developed. These systems, which are still in development, either connect to existing neurons or to electrodes implanted in the brain to decode brain signals and control a robotic arm. Although they are an excellent way to assist the disabled, the development of these new systems is prohibitively expensive. The surgery required is both complicated and expensive. These systems' robotic arms are also extremely expensive. Developing the entire system will cost hundreds of thousands to millions of dollars. I wondered if I could create a system that is affordable to the majority of those in need.
Task:
Phase one:
In phase one I constructed a simple robotic arm that would mimic the motion of my arm. I used servo motors, DC motors and motor driver circuits to achieve this on the prosthetic arm. As far as the arm of the user is concerned, I used potentiometers at each joint location of the human arm. This resulted in change of potentiometer values every time I would move my arm and these changes would control the motors and cause the movement of the robotic arm.
Phase two:
While a project like this felt interesting, I realized later that it would be most effective when we make it wireless and controlled by something else instead of our arm. Our brain sends signals to our hand to move the way we want it to. I was also reading about brain computer interface and was developing interest in it, which is when I came across the Neurosky EEG and decided to buy one and turn the robotic arm into one which can be controlled by our brain wave and eye bink.
Action:
Phase 1:
The arm has six degrees of freedom: a swivel base, a servo motor in the "shoulder," a servo motor in the "elbow," and two servo motors in the "doll," one for up and down movement and one for left and right rotation.
A sixth servo motor is located at the handling clamp.
I created various designs for the various parts, and these are the most "completed," the result of much "trial and error." It now resembles the actual structure of an industrial arm.
The length of the section between the elbow and wrist is nearly equal to the length of the "hand," allowing for good balance; and to assist with this, I put springs in the elbow to have a good balance of weights and thus assist servo motors.
When the arm is tilted forward, the servo shoulder has the "reinforcement" of a spring.
The servo motor has some control circuits and a potentiometer (a variable resistor) connected to the servo motor's central axis. It can be seen on the right side of the circuit in the figure. This potentiometer allows the control circuitry to monitor the servo motor's current angle. If the shaft is at the proper angle, the engine is turned off. If the circuit determines that the angle is incorrect, the motor will turn in the correct direction until the angle is correct. The shaft of the servo can rotate around 180 degrees. Normally, it reaches 210 degrees, but this varies depending on the manufacturer. A standard servo is used to control an angular motion ranging from 0 to 180 degrees.
Phase 2:
This time I used the extra pipes left by the plumber to cut into small parts and make a robotic arm (Since this was a personal project and 3D printing was still expensive that year). I used 5 servo motors to control the 5 fingers of the robotic arm. The build is very similar to most of the robotic arms on the internet. The trick here was to mostly combine an EEG with an Arduino. I used the Neurosky EEG to measure the brainwaves. The Neurosky EEG comes with a Bluetooth module that can be used to connect to the Bluetooth of the laptop. The EEG used here can detect some brainwaves from the forehead, eyebrow and earlobe regions. These readings are fed to the Arduino which I programmed to control the robotic arm. In this project I roughly chose few contrasting brainwaves because my aim was to only grasp objects with the robotic arm. Our brainwaves change as we concentrate on an object ahead of us or if we distract ourselves with thoughts, another input from the EEG here has been the ability of the Neurosky to detect blinking of the eye. With just these 3 inputs and taking their permutations and combinations we could program the robotic arm to do a few different tasks.
Result:
I managed to build the robotic arm successfully, below is a video of my friend using it.
PLEASE NOTE: SINCE THIS WAS A PERSONAL PROJECT I DID NOT GO AHEAD INVESTING IN A 3D PRINTED ARM BUT RATHER USED PLASTIC PARTS AVAILABLE AT HOME TO BUILD AN ARM.
